3 Small DIYs That Changed Our Home

Hello! Our life got so busy and hectic, in the most precious way!
Mom life is definitely kicking my butt, but the ordinary everyday feels so special. I truly enjoy being a mother to my Yoshi. I’m madly in love, and it’s bittersweet to witness him grow so rapidly.
I’ve been finding small things around the home to upgrade, and I recently completed a few projects which surprised me because it usually takes way longer for me to finish a project. Perhaps it was a good choice to work on small things. In ballet too, small things make the biggest differences…
My house projects lately—

1: DIY MIRROR FRAME
When we moved into our home, the previous owner left a giant (I mean, GIANT) mirror on the wall. Eddie and I have considered taking it down but we liked the mirror itself. It just didn’t go with our furniture and the style of the room, so I’ve been dying to frame it. However, getting a giant frame custom made would cost us a fortune. Therefore I’ve decided to DIY the mirror frame.

Got some decorative ornamental moulding from Home Depot.


I thought just paint would make the patina I was picturing.
I was wrong, just a “gold paint” wouldn’t bring the antique look I longed. So I took this painting moment as “priming”.

Rub ‘n Buff is a must have for DIY lovers with old hearts.
After browsing Pinterest, I found out Rub ‘n Buff is all I needed for the antique gold look. This changed my life and so many home decor in our home.

I used two different shades to add the depths and age.
After trial and error, I decided to go with “Leaf Gold” as the base gold, and “European Gold” for the shading. I also tried “Antique Gold”, however it was more of a Rose Gold. Which I didn’t want for this mirror frame.

I wanted the frame to be more interesting and a bit bulky, so I used corner block moulding for the corners.
e.
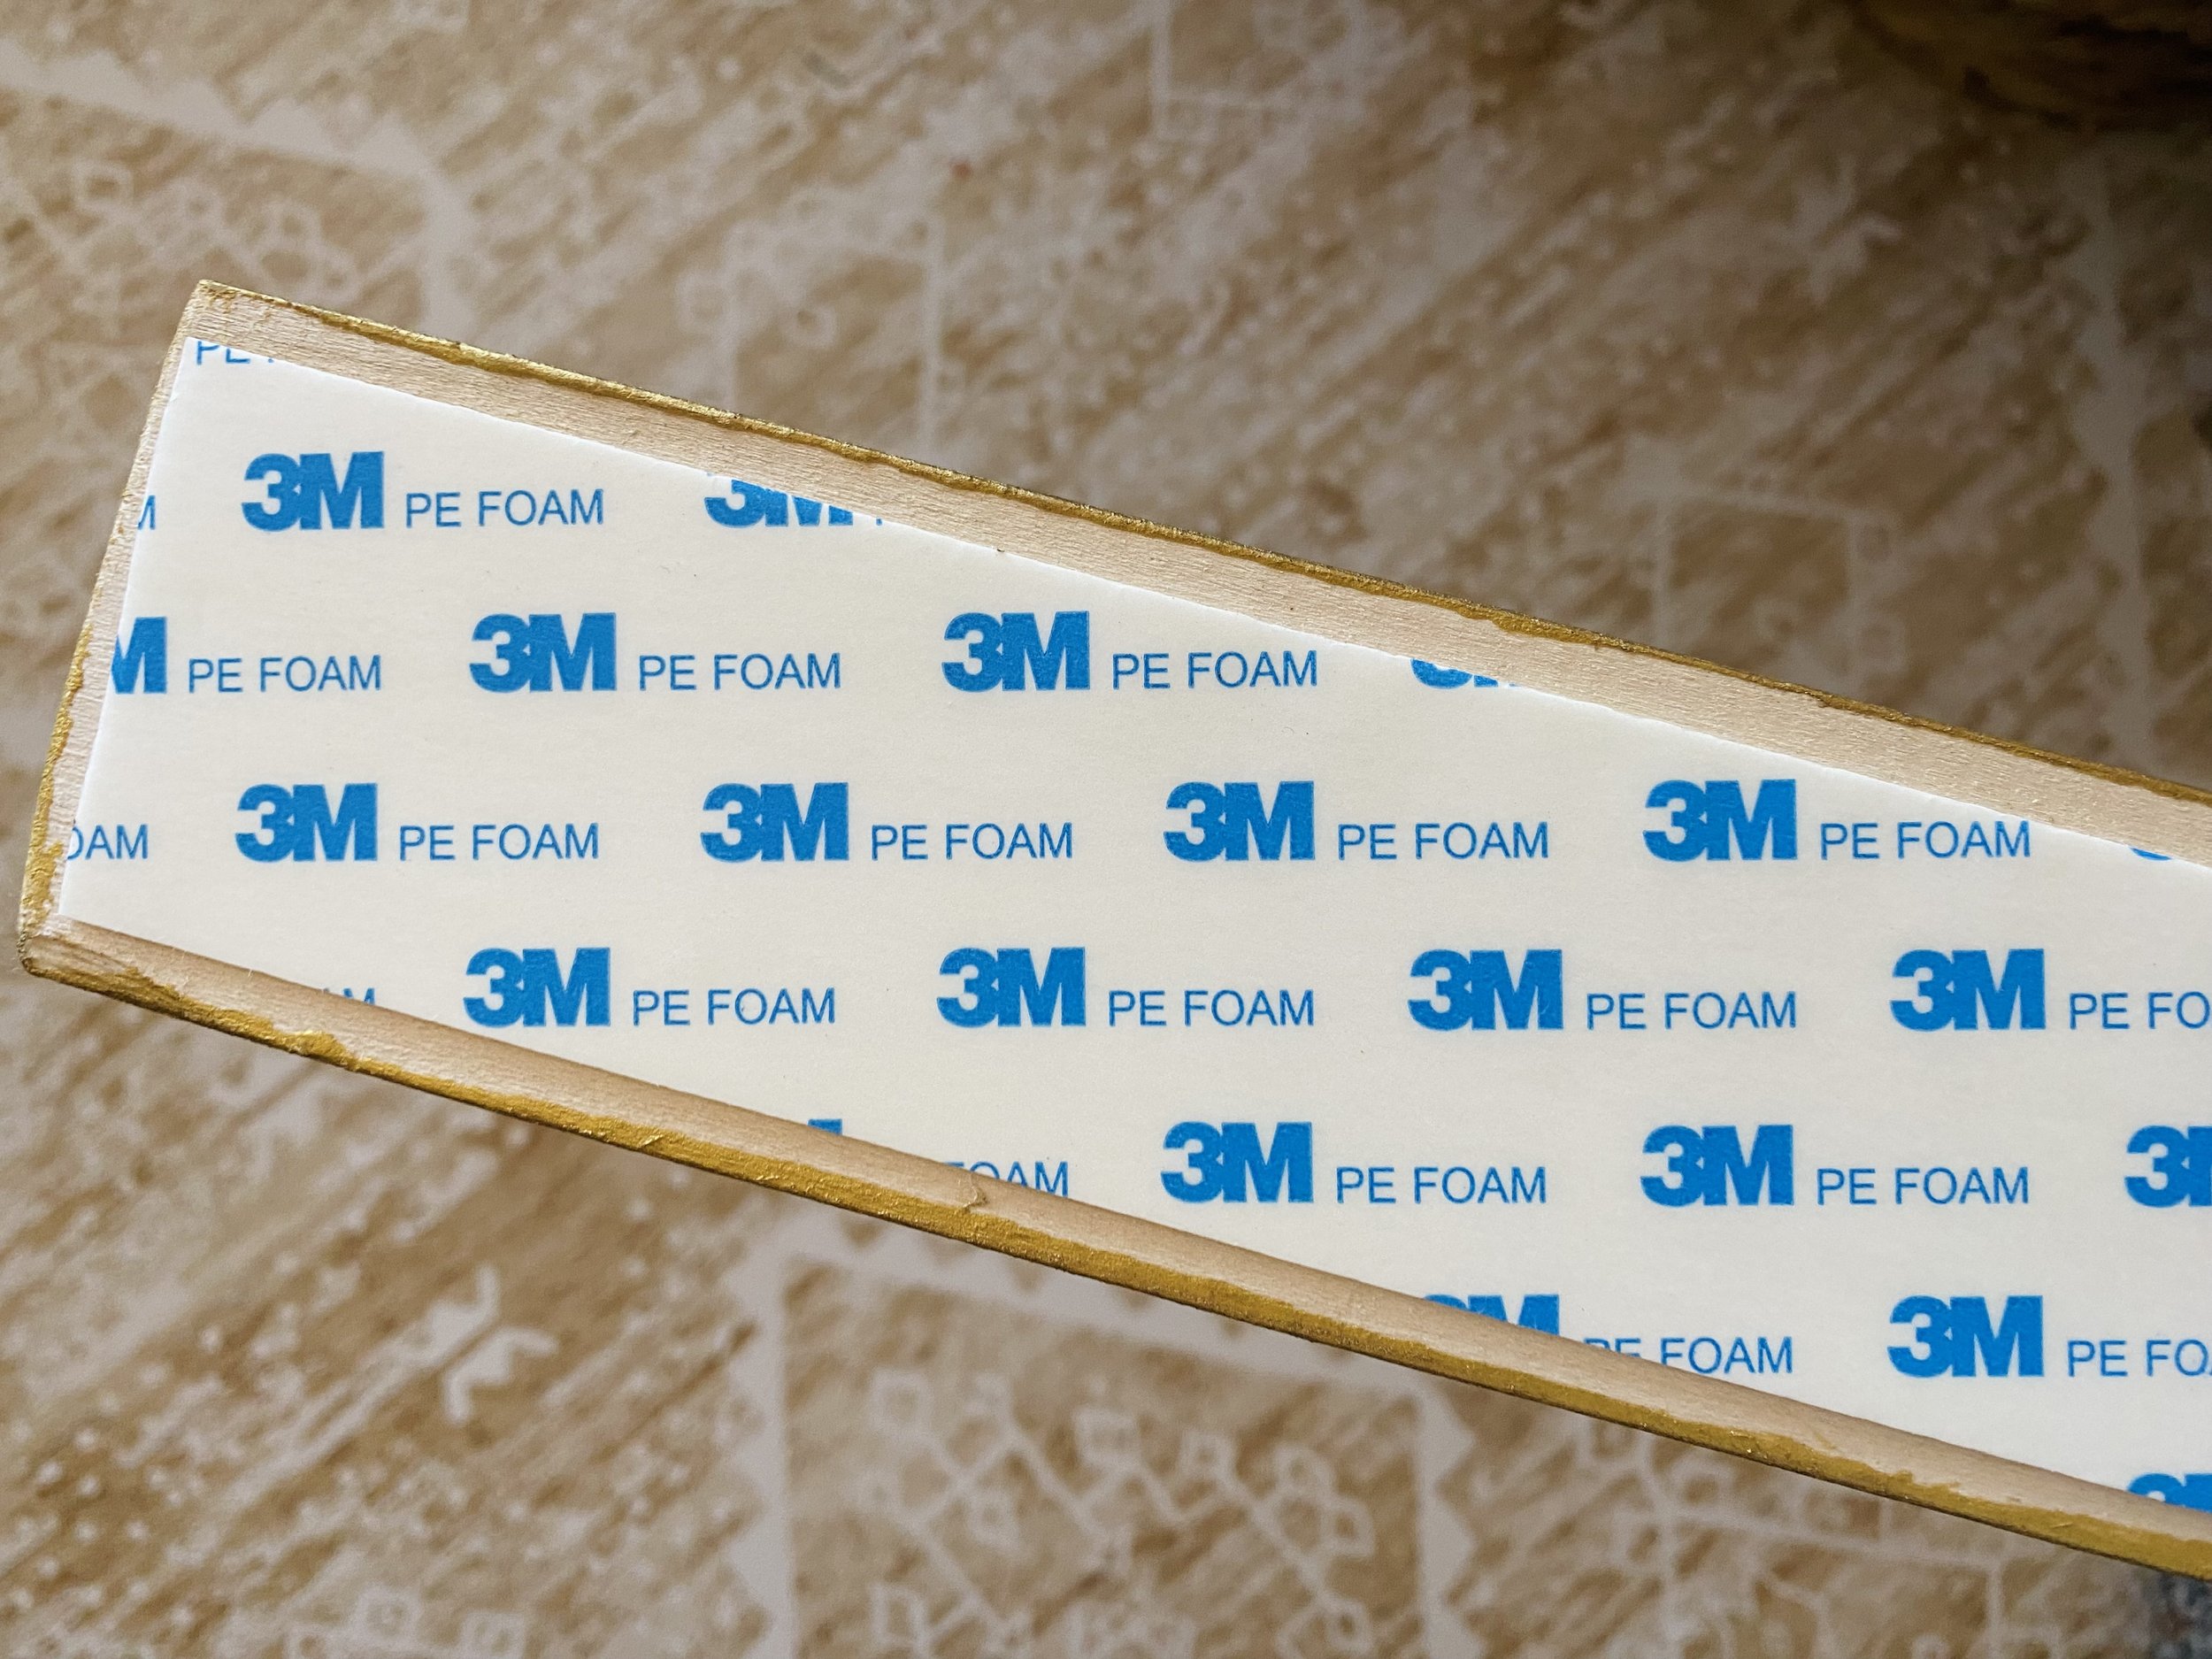
I didn’t use any nails or screws to install the moulding.
We were worried about excessively damaging the drywall so I opted out for double sided art hanging tape and it worked like a charm!!

BEFORE

AFTER
Total cost: about $140 (Moulding about $90, Primer painting $6, Rub ‘n Buff $6 x 4, Double sided tape $20)

2: UPCYCLING LAMPSHADES
I got this idea by @steviemaxine, an awesome home creator I follow and admire.

All you need is Gorilla Glue Spray (yes, they make spray)!
I’ve been thrifting plain lampshades for this project!

I found a pattern I LOVE, but it was hard to work with.
A lesson learned— it’s easier to do this DIY with irregular patterns. After cutting the fabrics, you just spray glue to the lampshades. SO EASY!

Because of the lampshade I chose, trim was needed.

After ironing the trim, I simple attached them using a glue gun.

Ta-dah!
The total cost: about $31 (Lampshade $2, Glue Spray $13, Fabric $16— I got 2.5 yds and I made 1 medium & 1 large shades, and I still have plenty of fabric left.)

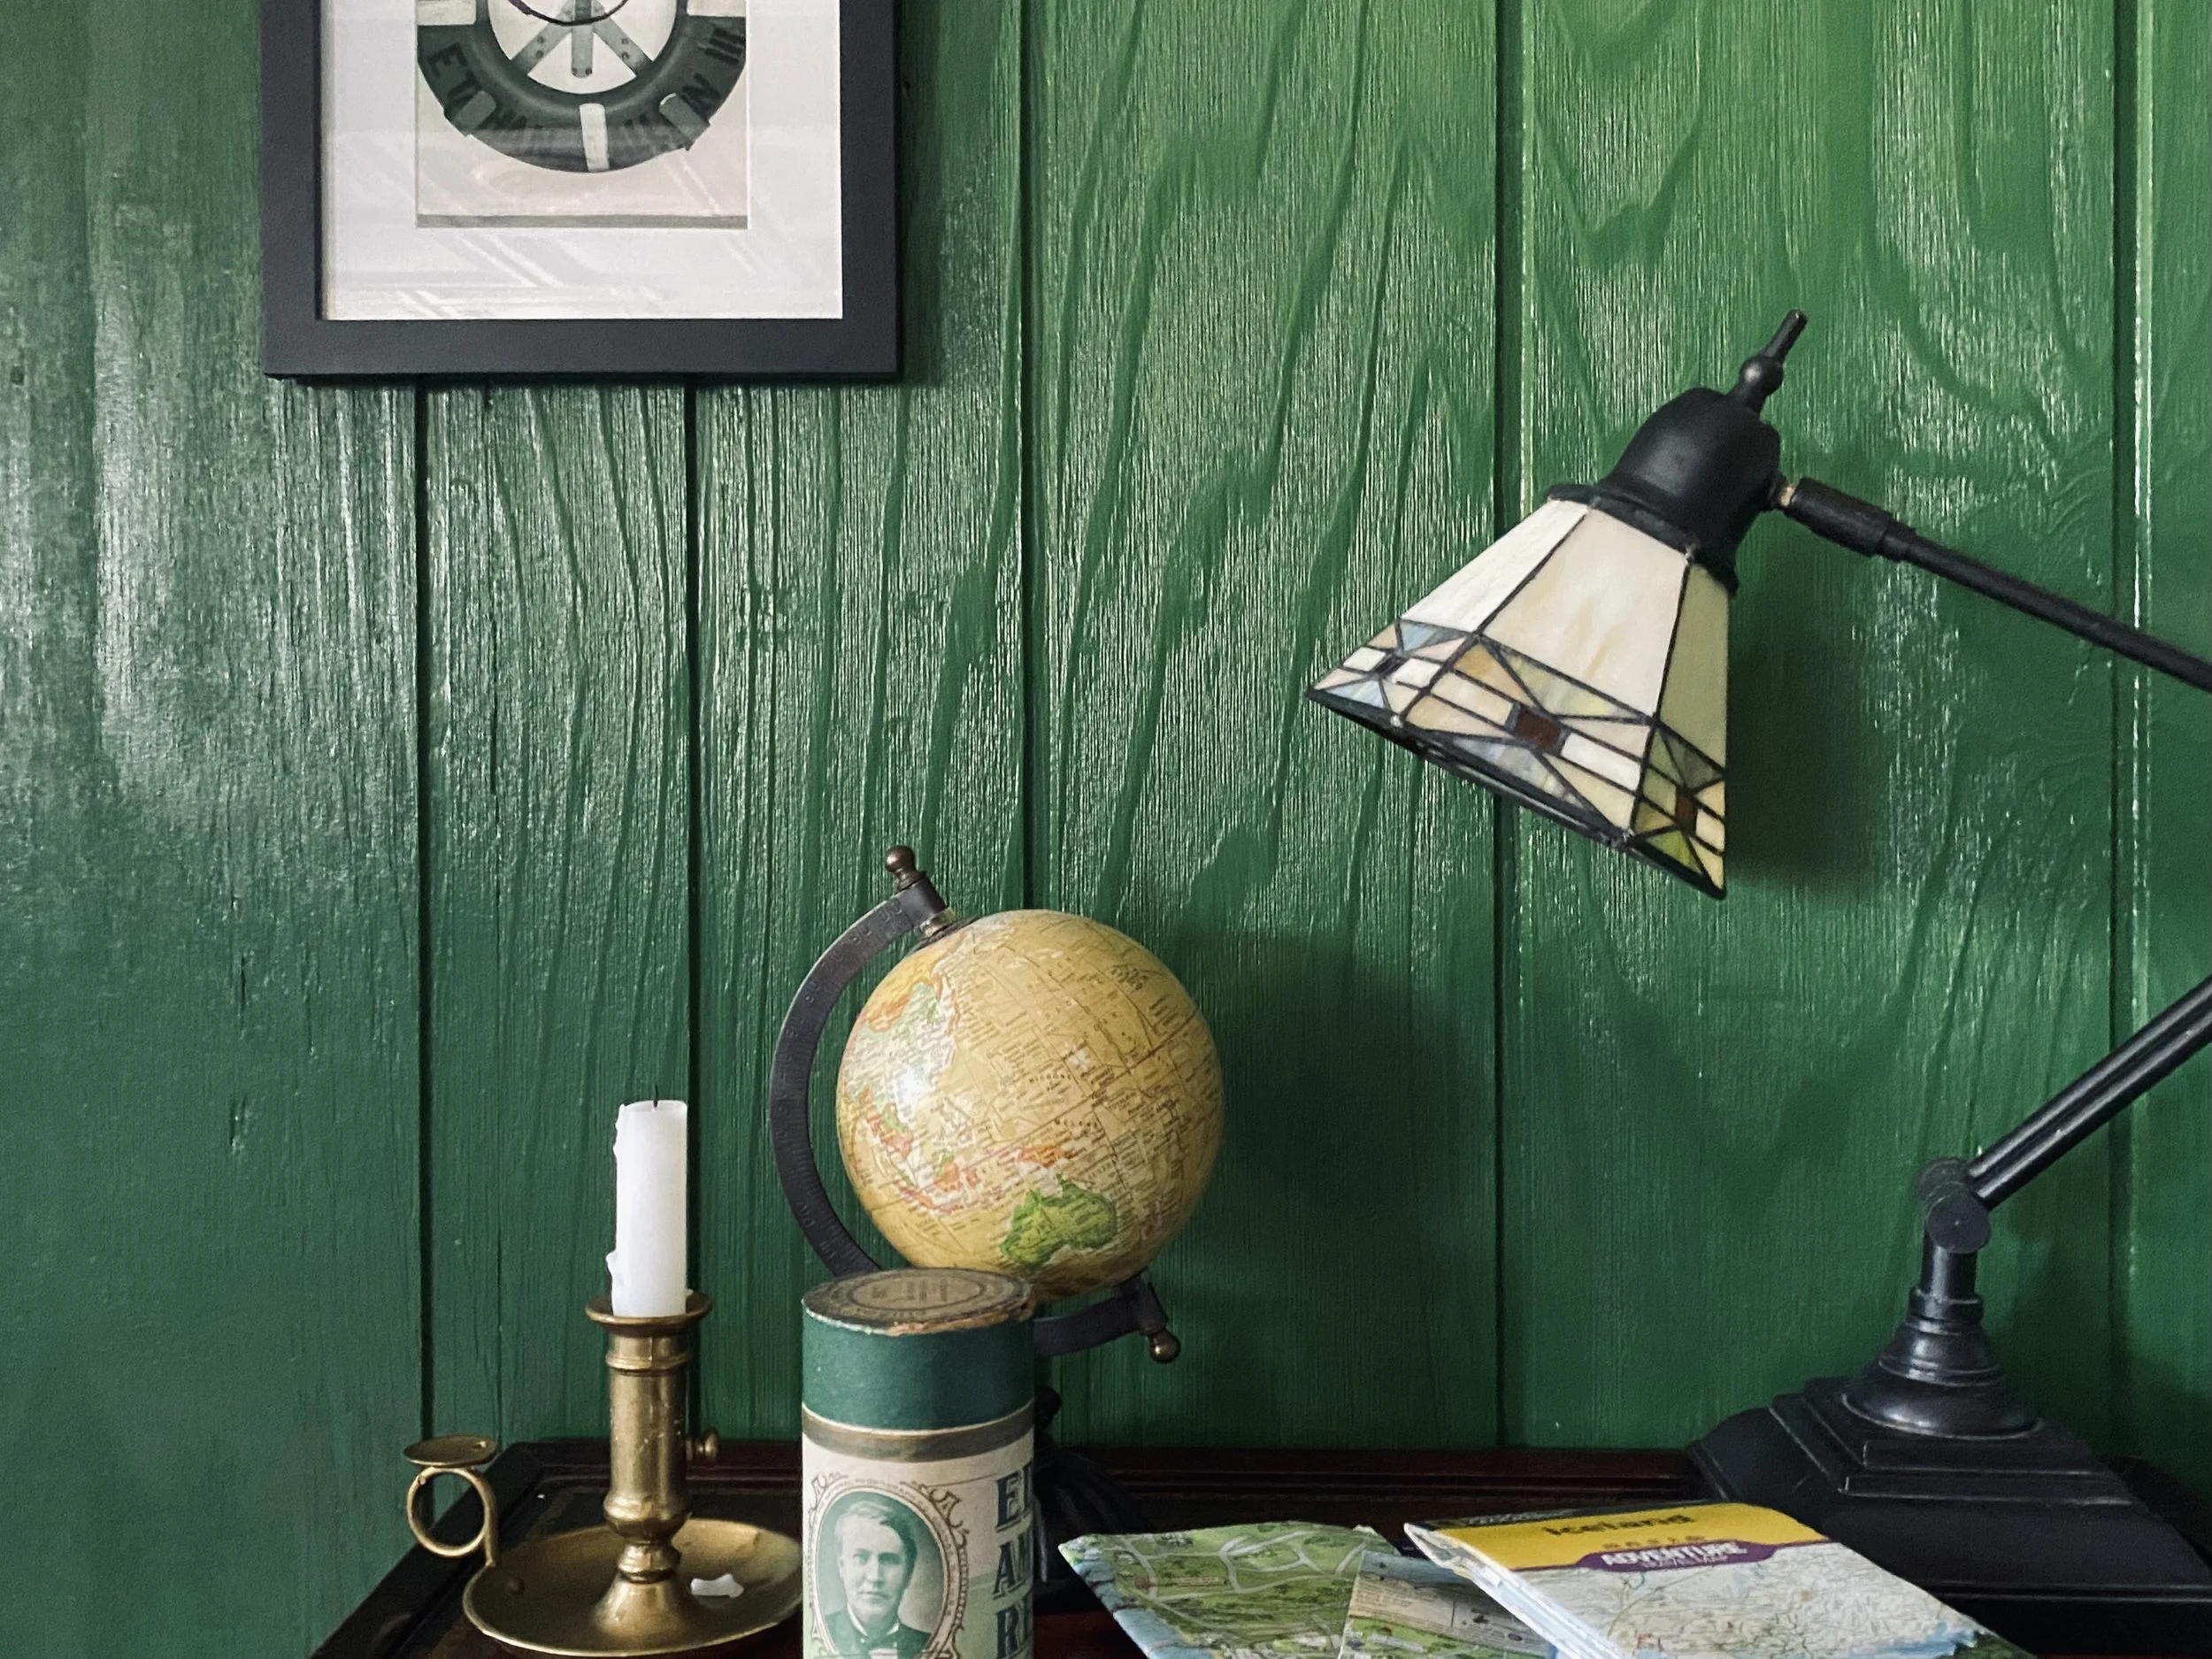
3: RUB' ‘N BUFF EVERYTHING
As I mentioned in DIY mirror frame, Rub ‘n Buff had changed my crafting life! I had thrifted many home decor but I ended up not displaying because the colors didn’t go with the rooms. Now that those items got a facelift with Rub ‘n Buff they are well styled in our home!

BEFORE

AFTER

I’m currently Rub ‘n Buffing this candle. holder!
It is drying as of now! I’ll share on my Instagram with the result!
I am sure you relate, but I have a thousand more house projects to go! It will take a long time but I am excited for every bits of the projects. I also hope one day I can enjoy these arts and crafts activities with Yoshi! Farewell, with a photograph of Yoshi approving the fabric I chose… Have a lovely week!